Deliciously Sweet and Simple: Mastering the Art of Homemade Strawberry Jam
- Gather fresh strawberries and necessary ingredients
- Prepare the strawberries for jam-making
- Cook the strawberries with sugar and lemon juice
- Test the jam for desired consistency
- Sterilize jars for preserving the jam
- Fill the jars with the strawberry jam
- Seal and store the jars properly
- Enjoy your homemade strawberry jam
There's nothing quite like the taste of homemade strawberry jam. Bursting with the natural sweetness of fresh strawberries, this delightful spread is a true treat for your taste buds. Making your own strawberry jam allows you to savor the flavors of summer all year round. Whether slathered on warm toast or used as a filling for pastries, homemade strawberry jam adds a touch of sweetness to any dish. With just a few simple steps, you can become a master at creating this delicious and versatile condiment in the comfort of your own kitchen. So let's roll up our sleeves and embark on a journey to discover the art of making homemade strawberry jam.
Gather fresh strawberries and necessary ingredients
To make the most delicious homemade strawberry jam, you'll need to start with the freshest strawberries and gather a few necessary ingredients. Head to your local farmer's market or pick-your-own farm to find the juiciest, ripest strawberries. Aim for about 2 pounds of strawberries, as this will yield approximately 4 cups of mashed berries. Additionally, you'll need granulated sugar and fresh lemon juice. The sugar helps to sweeten and preserve the jam, while the lemon juice adds a tangy flavor that enhances the taste of the strawberries. With these simple ingredients in hand, you're ready to embark on your journey of making delectable strawberry jam at home.
Prepare the strawberries for jam-making
To prepare the strawberries for jam-making, start by washing them thoroughly under cold water. Remove the stems and any blemishes from the berries. If desired, you can also slice or crush the strawberries to achieve a smoother consistency in your jam. Once prepared, measure out the required amount of strawberries according to your recipe. It's important to have all the ingredients ready before moving on to the next step to ensure a smooth and efficient jam-making process.
Cook the strawberries with sugar and lemon juice
Once you have prepared the strawberries, it's time to cook them with sugar and lemon juice to create a luscious strawberry jam. In a large saucepan, combine the strawberries, sugar, and freshly squeezed lemon juice. The sugar will help to sweeten the jam and preserve it, while the lemon juice adds a tangy flavor that complements the sweetness of the strawberries.
Place the saucepan over medium heat and bring the mixture to a gentle boil. Stir occasionally to ensure that the sugar is fully dissolved. As the strawberries cook, they will release their natural juices, creating a delightful aroma that fills your kitchen.
Allow the mixture to simmer for about 20-30 minutes, or until it thickens and reaches your desired consistency. Keep in mind that as it cools, the jam will continue to thicken slightly. To test if it's ready, place a small amount on a chilled plate and let it cool for a few seconds. If it wrinkles when you push your finger through it, then it has reached its desired consistency.
Remember to keep an eye on the heat as you don't want the jam to burn or stick to the bottom of the pan. Adjust the heat accordingly if necessary.
Once your strawberry jam has reached its perfect consistency, remove it from heat and let it cool slightly before transferring it into sterilized jars. This step ensures that your jam stays fresh for longer periods of time.
Next up: Sterilizing jars for preserving the jam
Test the jam for desired consistency
Once the strawberries have cooked down and the sugar has dissolved, it's time to test the jam for its desired consistency. Take a small amount of the mixture and place it on a chilled plate. Let it cool for a few seconds, then run your finger through it. If the jam wrinkles and holds its shape, it's ready. If not, continue cooking for a few more minutes and repeat the test until you achieve the perfect consistency. Remember that the jam will thicken further as it cools, so don't overcook it.
Sterilize jars for preserving the jam
To ensure the long-lasting freshness of your homemade strawberry jam, it is crucial to sterilize the jars before filling them. Sterilizing the jars helps eliminate any bacteria or microorganisms that could potentially spoil your delicious creation.
To begin, wash the jars and lids with hot soapy water and rinse them thoroughly. Then, place the jars in a large pot filled with enough water to cover them completely. Bring the water to a gentle boil and let it simmer for about 10 minutes. This boiling process will kill any remaining germs.
While the jars are boiling, you can also sterilize the lids by placing them in a separate pot of simmering water for a few minutes. It's important to note that metal lids should not be boiled as they may become damaged or rusted.
After sterilizing, carefully remove the jars and lids from the pots using tongs or a jar lifter. Place them upside down on a clean towel to dry completely. Be cautious not to touch the inside of the jars or lids with your hands to avoid introducing any bacteria.
Once dry, your jars are ready to be filled with your luscious strawberry jam. Remember, proper sterilization is essential for preserving your jam's quality and taste, ensuring you can enjoy its delectable flavor for months to come.
Fill the jars with the strawberry jam
Once your strawberry jam has reached the desired consistency, it's time to fill the jars and preserve all that deliciousness. Carefully ladle the hot jam into clean, sterilized jars, leaving about 1/4 inch of headspace at the top. Use a funnel to prevent any spills or messes. Wipe the rims of the jars with a clean cloth to ensure a proper seal. Place the lids on top and screw them tightly. Make sure not to over-tighten as this can interfere with the sealing process. Label each jar with the date and store in a cool, dark place for up to one year. Now you have your very own homemade strawberry jam ready to enjoy anytime!
Seal and store the jars properly
Sealing and storing the jars properly is crucial to ensure the longevity and quality of your homemade strawberry jam. After filling the jars with the jam, wipe the rims clean to remove any residue. Place the lids on top and screw them tightly. To create a vacuum seal, you can either process the jars in a water bath canner for 10 minutes or use the inversion method. If using the inversion method, simply turn the jars upside down for about 5 minutes before flipping them right side up. This helps create a tight seal as the jam cools down. Once sealed, label each jar with the date of preparation and store them in a cool, dark place like a pantry or cellar. Properly sealed and stored strawberry jam can last up to a year if unopened. Remember to refrigerate any opened jars and consume within a month for optimal freshness.
Enjoy your homemade strawberry jam
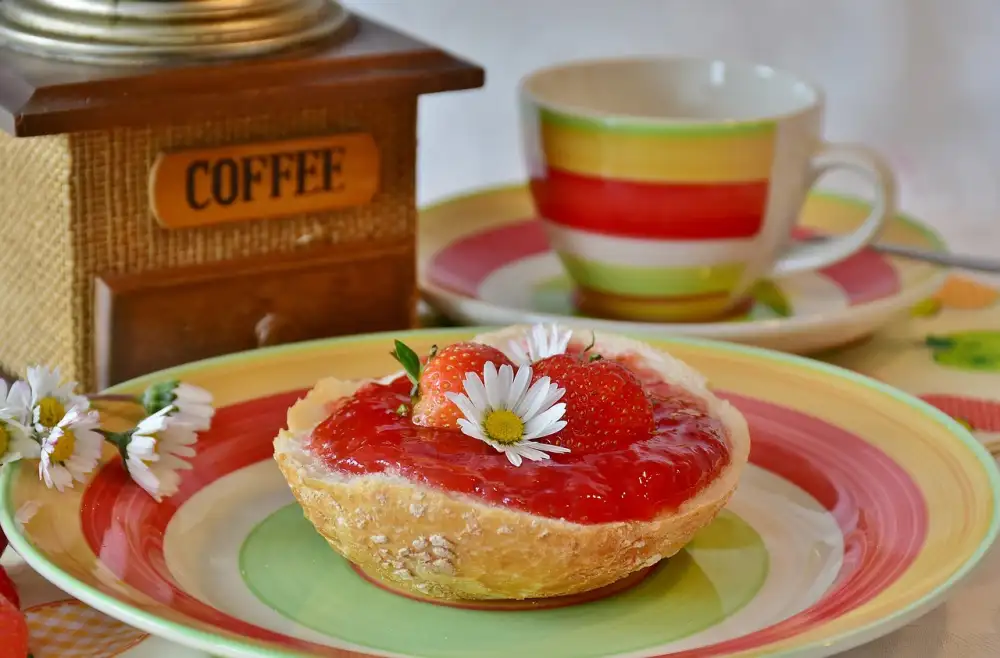
Once you have sealed and stored your jars of homemade strawberry jam, it's time to savor the fruits of your labor. Spread a generous dollop of this luscious jam on a slice of warm buttered toast or use it as a filling for pastries and cakes. The vibrant red color and intense flavor will surely delight your taste buds. Remember to share your creation with friends and family, as homemade strawberry jam makes for a delightful gift. Enjoy the sweet satisfaction that comes from mastering the art of making this delectable treat!
In conclusion, mastering the art of homemade strawberry jam is a delightful and rewarding experience. By following these simple steps, you can create a delicious spread that will impress your taste buds and those of your loved ones.
To ensure the best results, remember these final tips:
1. Use fresh and ripe strawberries for the most intense flavor.
2. Adjust the sugar and lemon juice to suit your taste preferences.
3. Be patient while cooking the strawberries to achieve the desired consistency.
4. Properly sterilize jars to prevent spoilage and extend shelf life.
5. Store the sealed jars in a cool, dark place for optimum preservation.
With these tips in mind, you are now ready to embark on your journey of creating delectable homemade strawberry jam. Enjoy this sweet treat on toast, scones, or as a filling for pastries. Happy jam-making!
Published: 30. 11. 2023
Category: Food